Setup Client Script
Client Scripts in Verza are JavaScript files, from creating a beatiful UI to animating objects adding interactivity to your server.
See the different types of scripts here.
What Are We Building?
By the end of this guide, you'll have a Client Script that looks like this with a box that moves from left to right back and forth.
Requirements
- Basic knowledge of JavaScript and Git
- Node.js (v16 or higher)
Verza Create CLI
Verza Create CLI is a command-line tool that allows you to create a new project with a Client Script or Server Script already setup.
You will get out of the box:
- 📜 The template of your choice (
JavaScript,TypeScriptorReact) - 🔥 Hot reloading for your scripts.
- 🚀 Deploy support for
Cloudflare PagesorVercelforClientandWebServerscripts. - 🏷️ Auto-versioning for your scripts when deploying a new change.
- ⚙️ Vite as the build tool
Verza Create CLI uses the powerful and simple Vite build tool. Any Vite plugins can be used in your project 🎉.
With NPM:
npm create verza@latest

# or

npm create verza@latest <template> <project-name>
With Yarn:
yarn create verza

# or

yarn create verza <template> <project-name>
With PNPM:
pnpm create verza

# or

pnpm create verza <template> <project-name>
Available Templates
| Template | Description |
|---|---|
javascript | JavaScript template |
typescript | Typescript template |
react | React JavaScript template |
react-ts | React TypeScript template |
Would you like to see a new template added? Open an issue
Creating a New Project
Create a New Project
Create a new project using the Verza Create CLI:
npm create verza@latest javascript my-project
cd my-project
npm install
Start Development Server
npm run dev
By default, the server will run on http://localhost:8085. You can change the port and more in the verza.config.ts file, check out the Vite docs for more information.
Project Structure
| Folder/File | Description |
|---|---|
/public | Contains all the static files for your project. |
/src | Contains all the source code for your project. |
/src/client | Contains all the client scripts for your project. |
/src/server | Contains all the server scripts for your project. |
.gitignore | Contains the files and folders to be ignored by git. |
package.json | Contains the dependencies and scripts for your project. |
.eslintrc.cjs (React Only) | Contains the configuration for the ESLint linter. |
tsconfig.json (TypeScript Only) | Contains the configuration for the TypeScript compiler. |
verza.config.js | Contains the configuration for the Verza & Vite build tool. |
Routing
Routes is the way to define the URL of your scripts, the verza server will use the route to load the script.
You can define the routes for your scripts by creating a folder with the name of the route in the src/client/script-name/script.js format.
For example, if you want to create a script for the /interactions route, you will create a folder called interactions in the src/client folder and inside that folder, you will create a script.js file.
Script Path: /src/client/interactions/script.js
Script URL: http://localhost:8085/interactions
The same applies to the src/server folder, but usually, you will want to have one script in the src/server folder, see the Setup WebServer Script guide for more information.
Scripts Versioning
You don't need to worry about versioning your scripts, the Verza build tool will automatically version your scripts when you deploy a new version.
On each new deployment, the Verza build tool will create a version of each script and will add a redirect to the latest version of the script, so you can keep using the same URL (route) for your scripts.
Edit Script
In the src/client folder, you'll find a script.js file that contains the code for your script.
You will see a simple script that creates a box by default.
Let's replace the code with the following that creates a box that moves from left to right back and forth.
import {initEngine} from '@verza/sdk';

export default function script(id) {
  const engine = await initEngine(id);

  engine.localPlayer.sendMessage('Welcome to my server!');

  const box = engine.objects.create('box', {
    color: 'red',
    position: [-2, 2, 5],
    collision: 'static',
  });

  box.startTransitions([
    {
      to: [-2, 2, 5],
      toRotation: [0, 0, 0],
      duration: 1000,
      easing: 'easeInOutQuad',
      loop: true,
    },

    {
      to: [2, 2, 5],
      toRotation: [0, Math.PI, 0],
      duration: 1000,
      easing: 'easeInOutQuad',
      loop: true,
    },
  ]);
}
Each script needs a default function that will be called when the script is loaded in the server.
The default function for Client Scripts receives the id parameter that is used to initialize the engine manager.
This id is unique for each script and it's used to identify the script in the server.
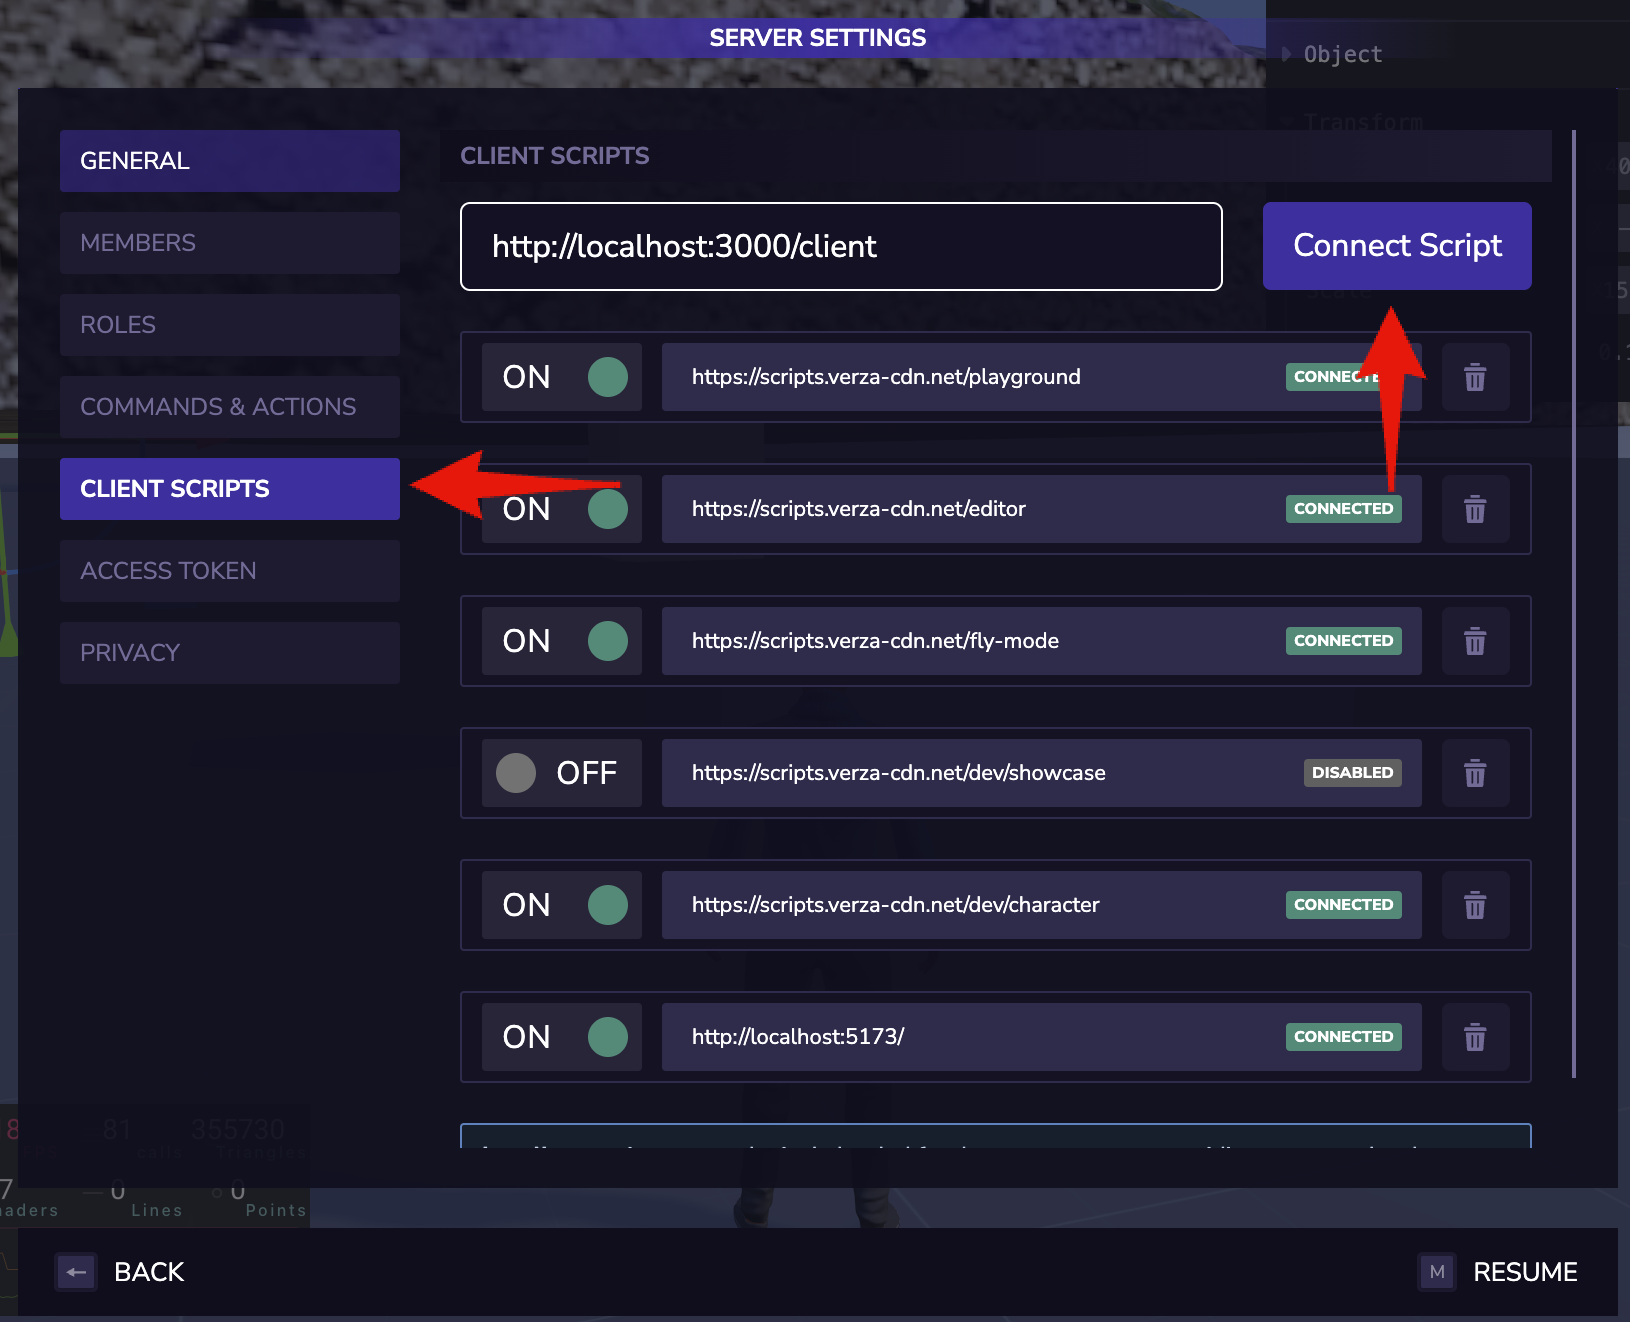
Add to Server
To add the Script to your server, go to the Scripts tab in your Server's Settings. Then, enter the URL of your script and click on Connect Script.
By default, the URL of your script in development mode is http://localhost:8085/script
Deploy
Verza supports deploying your scripts to different platforms, you can deploy your scripts to:
| Platform | Github Integration | Pricing |
|---|---|---|
| Cloudflare Pages | ✅ | Free (Recommended) |
| Vercel | ✅ | Free |
Deploy to Cloudflare Pages
Connect your
GithuborGitlabaccount toCloudflare PagesfromWorkers & Pages > Overview > Create Application > Pages -> Connect GitSelect your repository and set the configuration as follows:
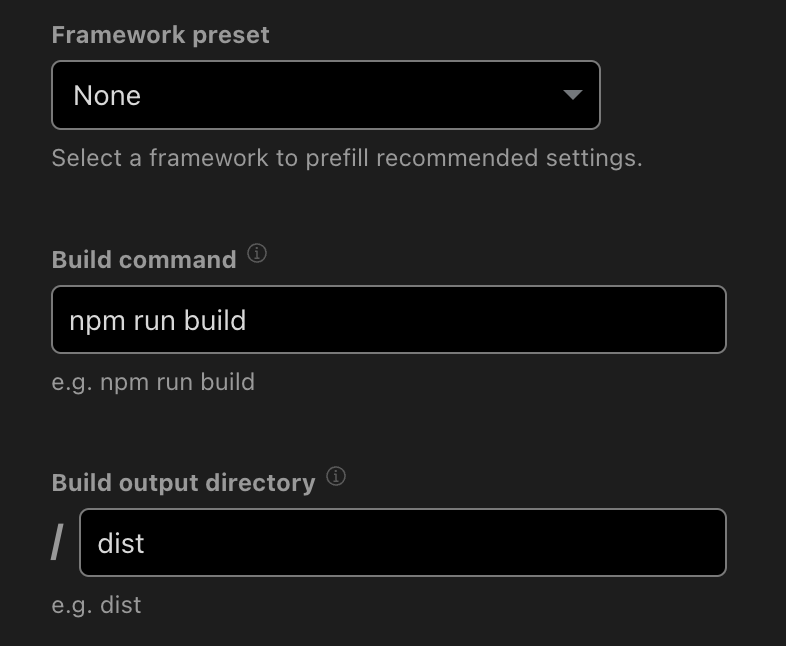
- Copy the generated URL from
Cloudflare Pagesand connect it to your server, for example:
https://YOUR-CLOUDFLARE-PAGES-URL.pages.dev/script
Deploy to Vercel
Import your repository into
VercelfromAdd new -> ProjectSelect your repository and set the configuration as follows:
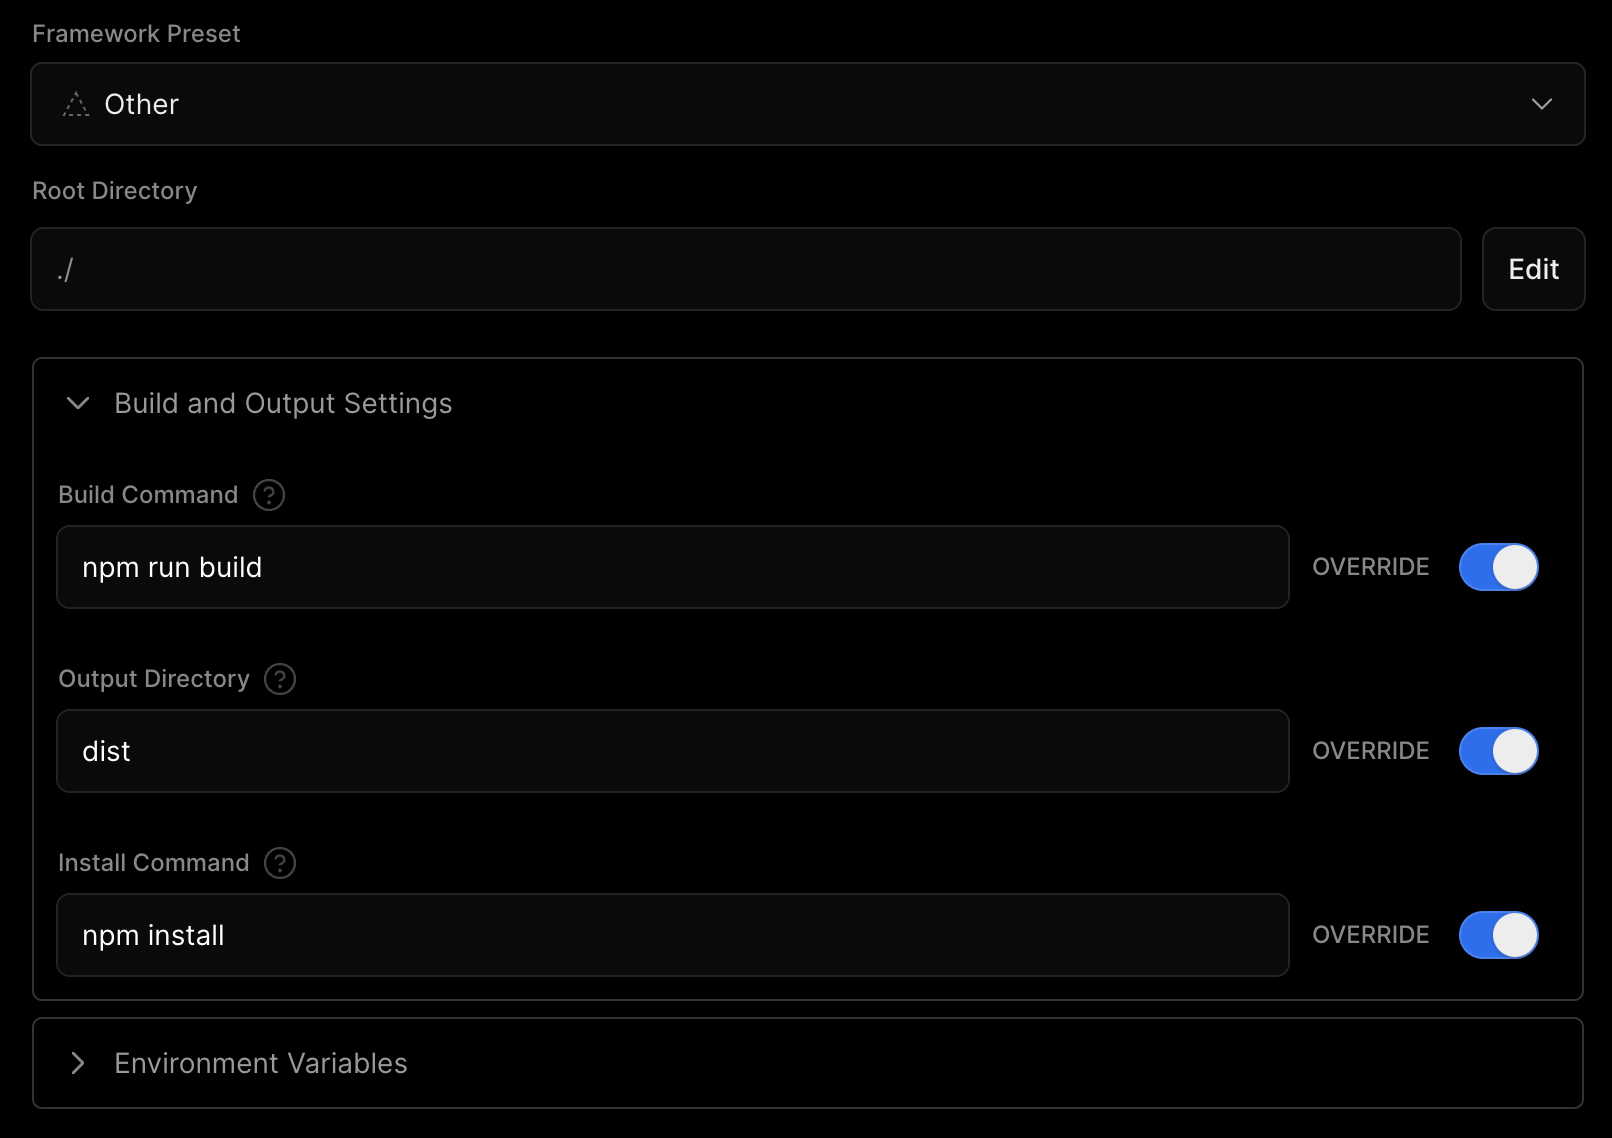
- Copy the generated URL by
Cloudflare Pagesand connect it to your server, for example:
https://YOUR-VERCEL-URL.vercel.app/script
In-Server Script Editor
For basic scripts, you can use the in-server script editor, it's a lightweight editor that allows you to write and run scripts directly in your server with no need to host or deploy your script.
To open the Script Editor, use CTRL + SHIFT + J or go to the Scripts tab in your Server's Settings. Then, click on Toggle Script Editor
Manual Build & Deploy (Advanced)
Manual build & deploy not recommended for Client and WebServer scripts, we suggest to deploy to one of the platforms mentioned above, you don't need any extra configurations with deploying to one of the platforms mentioned above.
If you're a fearless developer and want to host your script in your own hosting platform, you can do so by building your script manually.
To build your script manually, run the following command:
npm run build
This will create a dist and api folder with your scripts ready to be deployed, the dist folder will contain the client scripts and the api folder will contain the server scripts.
For the Client Scripts you can use any static hosting platform, for the Server Scripts you will need to host them in a platform that supports serverless functions or a node http server.